
Appearance
Scene Settings
Settings that apply to the whole scene. Open them with nothing selected (sections can be collapsed with their arrows to keep things tidy).
General
- Name – a clear scene name; the foundation of a manageable, larger experience.
- Tracking coaching overlay – on by default; prompts the user to move their device so it can establish solid tracking.
- Pause controls – on by default; how viewers pause. The button in the top left corner during playback on iPhone, iPad and Mac, and a button on their hands on Apple Vision Pro. There, pinching and holding anywhere in their surroundings opens the pause menu whatever this is set to.
- Capture button – on by default; the camera button next to it, which lets viewers take a photo or record their session. Turn it off for scenes where capturing would confuse people about what the experience does.
- Placement confirmation – on by default; a brief message once the scene has its place in the world. Turn it off for a scene that should begin without any interruption.
- SharePlay participation mode – in a shared session, Presenter only (only the host interacts) or All participants (everyone can interact, simultaneously). Pick by whether the experience is about watching together or interacting together.
Leave a way out when you hide the pause controls
The pause menu is the only way to leave an experience, so a scene without pause controls needs another route in: any event can run the Pause Experience action to open the same menu, for example from a UI button you place yourself.
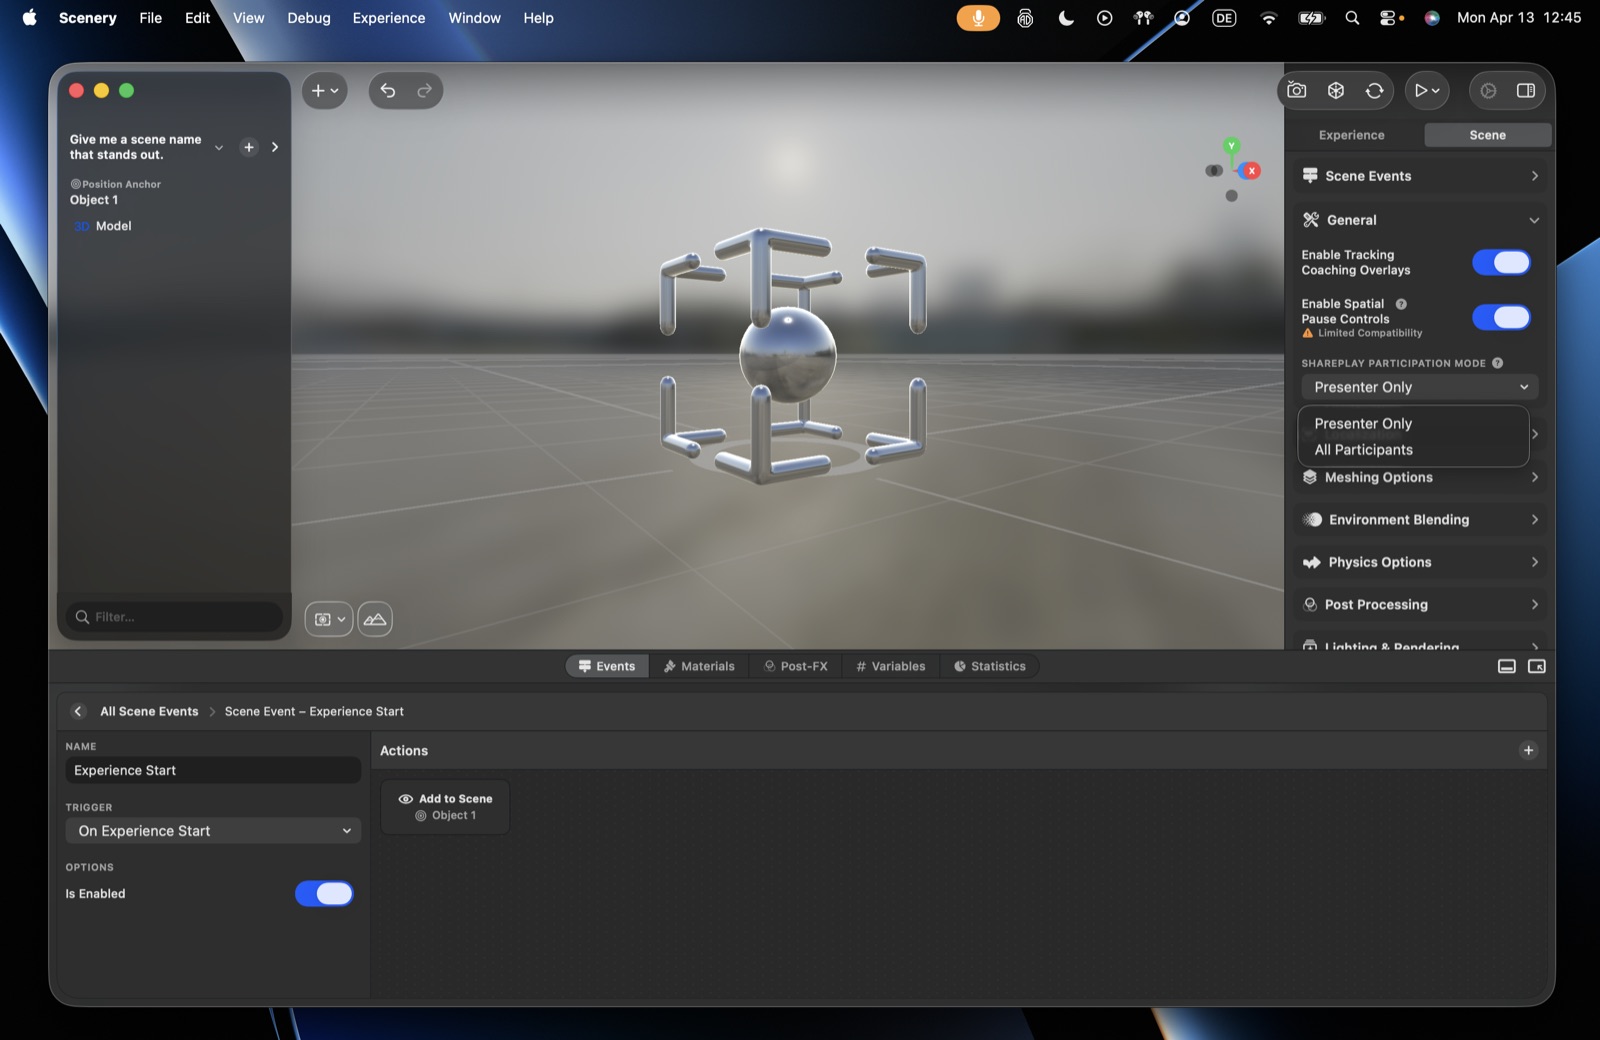 The General scene settings.
Placement & localization
How the scene finds its place in the real world – placed by the viewer, placed automatically, anchored to a printed marker, or localized against a location – has its own page: Placement & Localization. Markers live there too, under the method that uses them.
Meshing & occlusion
- Floor mesh – on by default; gives physics a floor to rest on (without it, physics objects fall through). A scene placed on a wall locates the floor before placement starts, so turning this off removes a step for the viewer when the scene doesn't need one – see Placement & Localization.
- World mesh – off by default (performance); builds a mesh of the real environment so content can collide with or be occluded by it.
- Scene mesh lighting – let the mesh be lit by objects in the scene.
- Object occlusion – real objects hide virtual ones behind them (LiDAR devices only). Big realism win – a virtual dog correctly hidden behind a real desk.
- People occlusion – real people/pets correctly pass in front of virtual content (recommend with depth; iPhone XS and later). Crucial realism for photos and videos taken inside the experience.
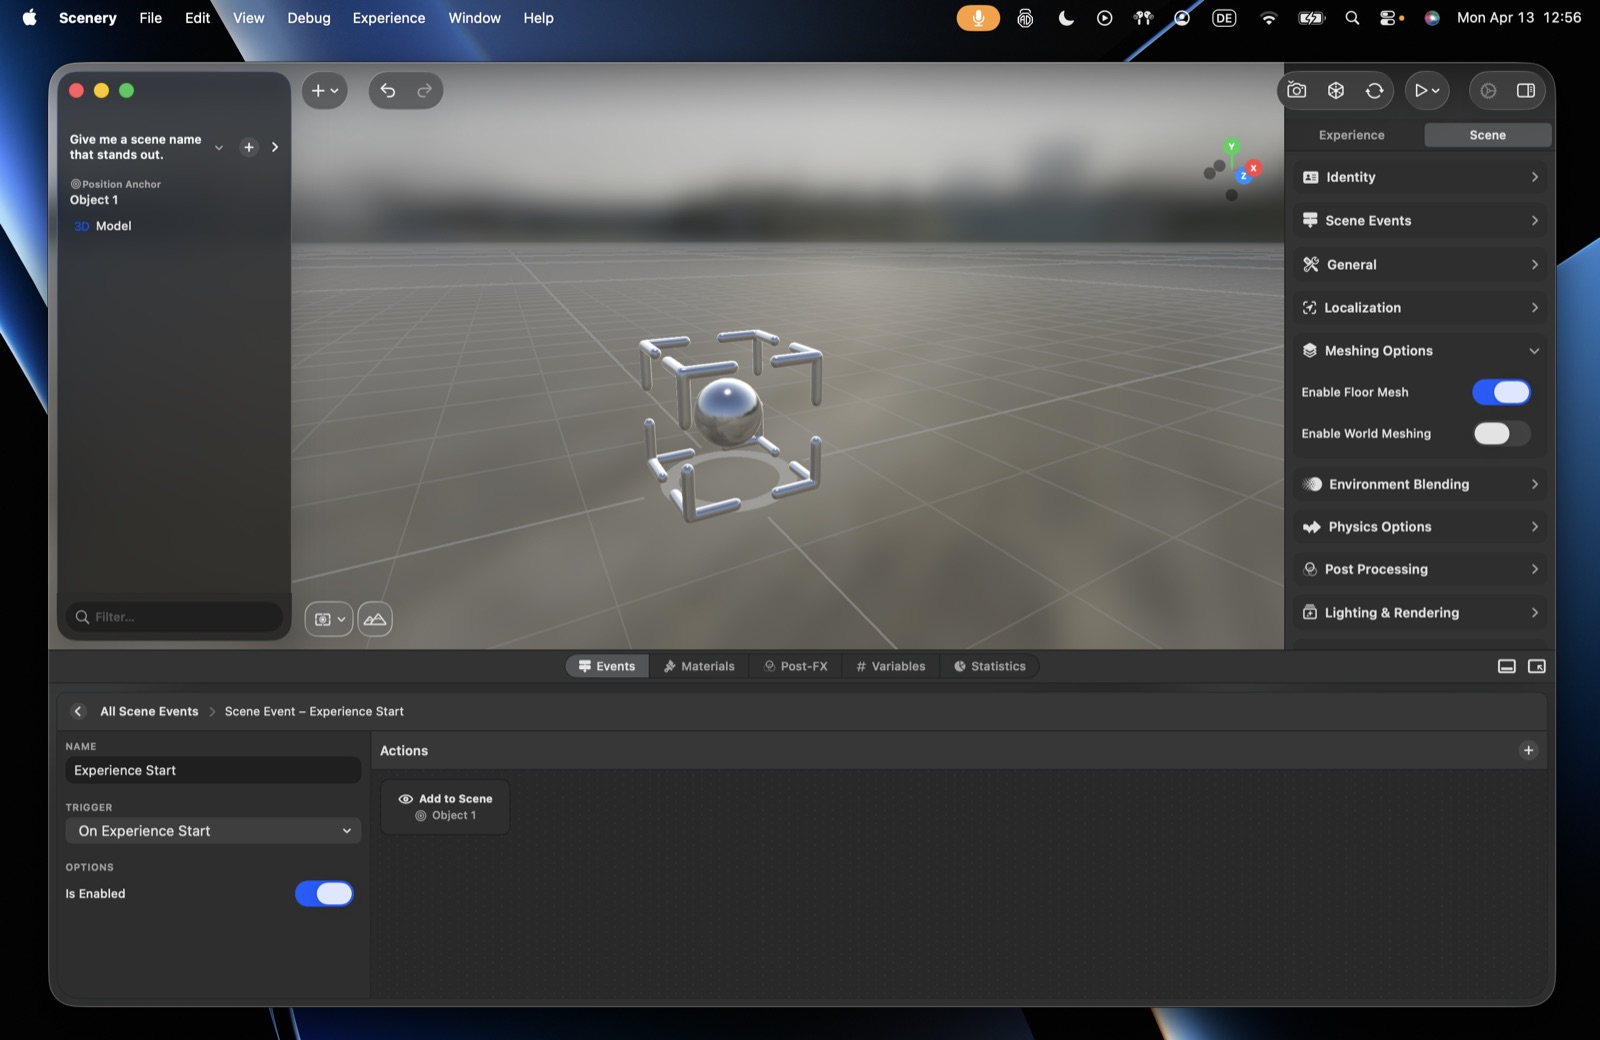 The Meshing Options.
Physics
- Scene mesh collisions – enable so physics objects can interact with the real environment.
- Gravity – default −9.81 (Earth); change it to simulate the moon, space, etc.
See Physics actions for using physics.
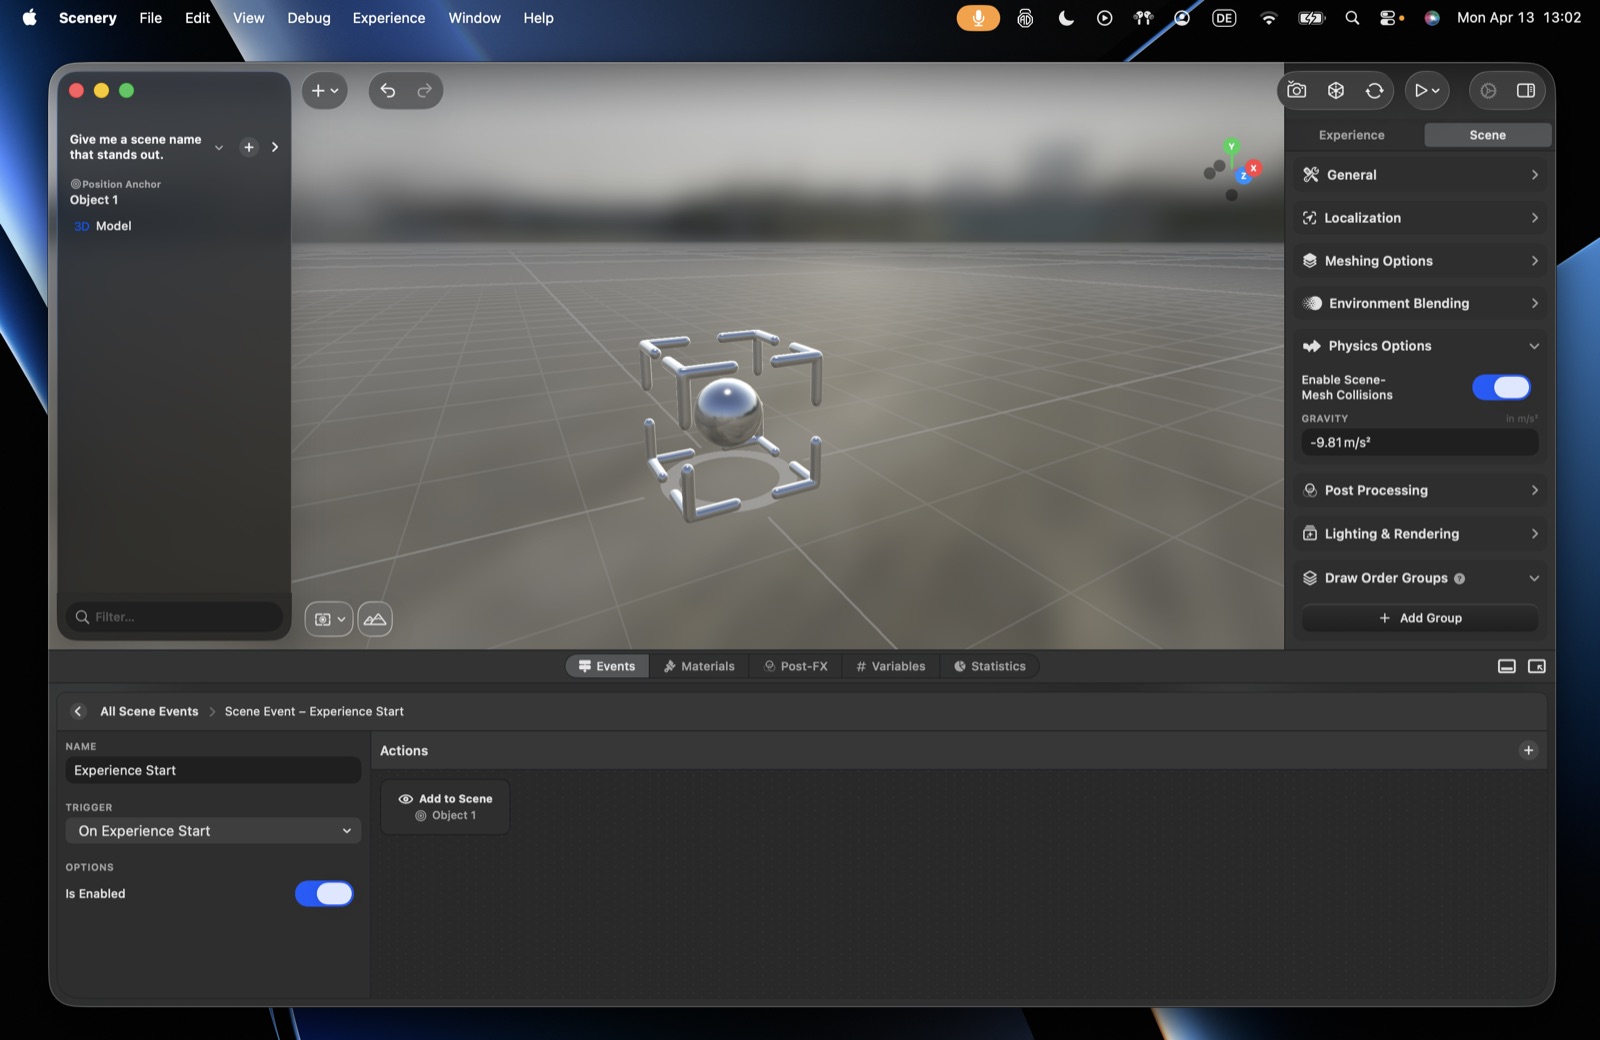 The scene Physics Options.
Post-processing
- Surroundings effect – dim/tint the real surroundings (none, semi-dark, dark, custom dim, custom tint). Apple Vision Pro only.
- Bloom – a luminous halo around bright objects. See below.
- Custom effects – apply post-processing effects (filters/shaders) to the whole scene. iOS / macOS only.
Bloom
Bright things bleed light into what's around them. Bloom recreates that: anything brighter than the threshold gets a soft halo. It reads best on emissive materials, screens, and light sources.
Platform support
Bloom requires iOS 27, iPadOS 27, macOS 27 or visionOS 27, on an iPhone 12, an iPad with an A14 or M-series chip, an Apple silicon Mac, or Apple Vision Pro. On earlier systems or devices the scene renders normally, without bloom – an experience using it still opens and plays everywhere.
On Apple Vision Pro, bloom appears only in an immersive space; it has no effect in a window or volume.
Not yet supported on the web.
Applies to decides what can bloom, and it's the setting that matters for performance:
- Selected objects (default) – only objects you mark bloom. Turn on Bloom in an object's Lighting & Shadows section to mark it.
- Whole scene – anything bright enough blooms, wherever it is, including the environment behind your content. Costs noticeably more, because the renderer searches the entire screen every frame instead of just around the objects you marked. Use it when bright areas can appear anywhere, and prefer Selected objects whenever you know what should glow.
Nothing glowing?
In Selected objects mode nothing blooms until you mark something, so turning bloom on by itself looks like it did nothing. Mark an object, and check it's actually bright enough to pass the threshold.
Then tune the look:
- Strength – how intense the halo is.
- Threshold – how bright something must be before it blooms. This isn't a 0–1 scale: 1 is about as bright as a fully lit white surface, and emissive materials go well beyond it, so raise it to keep the effect to the brightest highlights only. At 0, everything blooms however dim.
- Blur radius – how far the halo spreads, as a percentage of the screen height so it looks the same on every device. Larger values are softer and wider, and cost more to render.
Bloom is separate from the custom effects list, and from any bloom filter you may have added there. Use one or the other, not both.
Lighting & environment
These pair with the viewport's environment controls:
- Immersion mode – Mixed (AR) (default), Full VR (replace the camera feed with a background), or Progressive (Vision Pro: the user dials the virtual environment in/out within a range you set).
- Background – a custom colour, HDRI, or preset, used by Full VR / Progressive.
- Environment texturing – on by default (real-world lighting on PBR materials); off to use a custom light map you control.
- Adaptive resolution – automatically scales the render resolution to the device: a smooth frame rate on older hardware, best quality on newer. When it's on, a resolution multiplier (10–100%, default 100%) lets you fine-tune that balance by hand – lower it to render at a lower internal resolution for more performance headroom, or keep it at 100% for maximum sharpness.
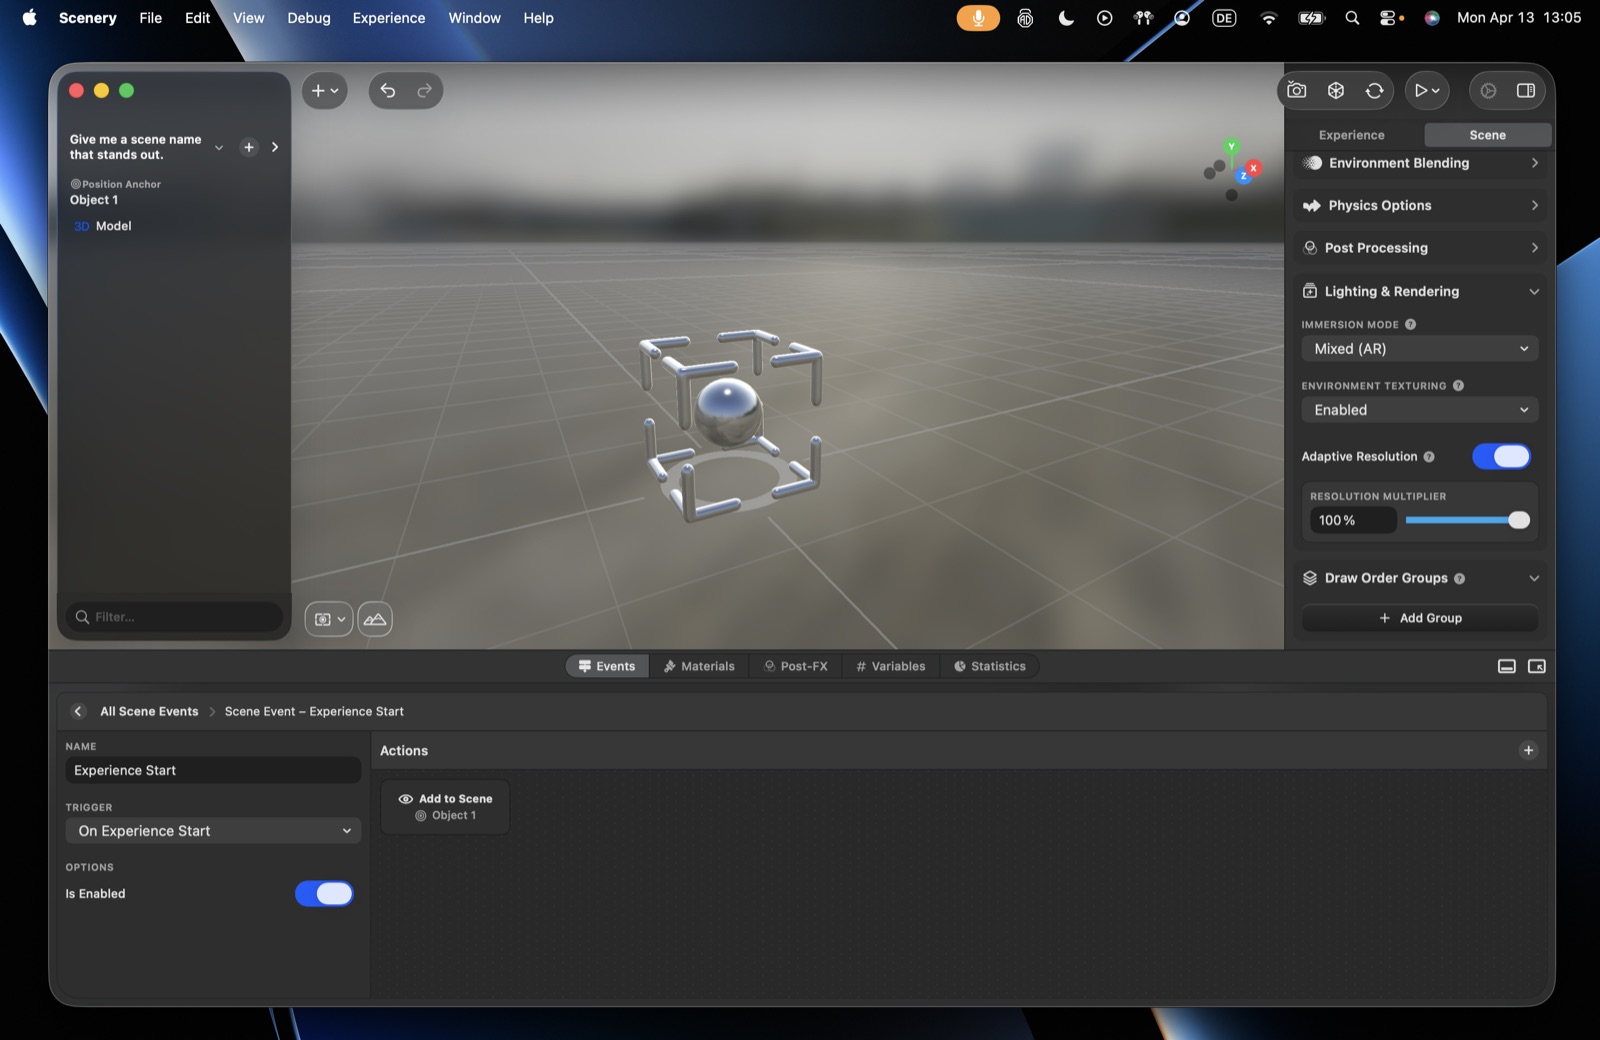 Lighting & Rendering – immersion mode, environment texturing, and resolution.
Draw order groups
Control the order in which objects render. Normally automatic, but stacked transparent elements (overlapping images/videos) can render with artifacts. Create a draw-order group, add the objects, and pick a depth pass:
- Pre-pass – computes depth before colour (better transparency).
- Post-pass – computes depth after colour (fewer artifacts in complex scenes).
- None.
Try different passes to see which resolves your scene's transparency best.
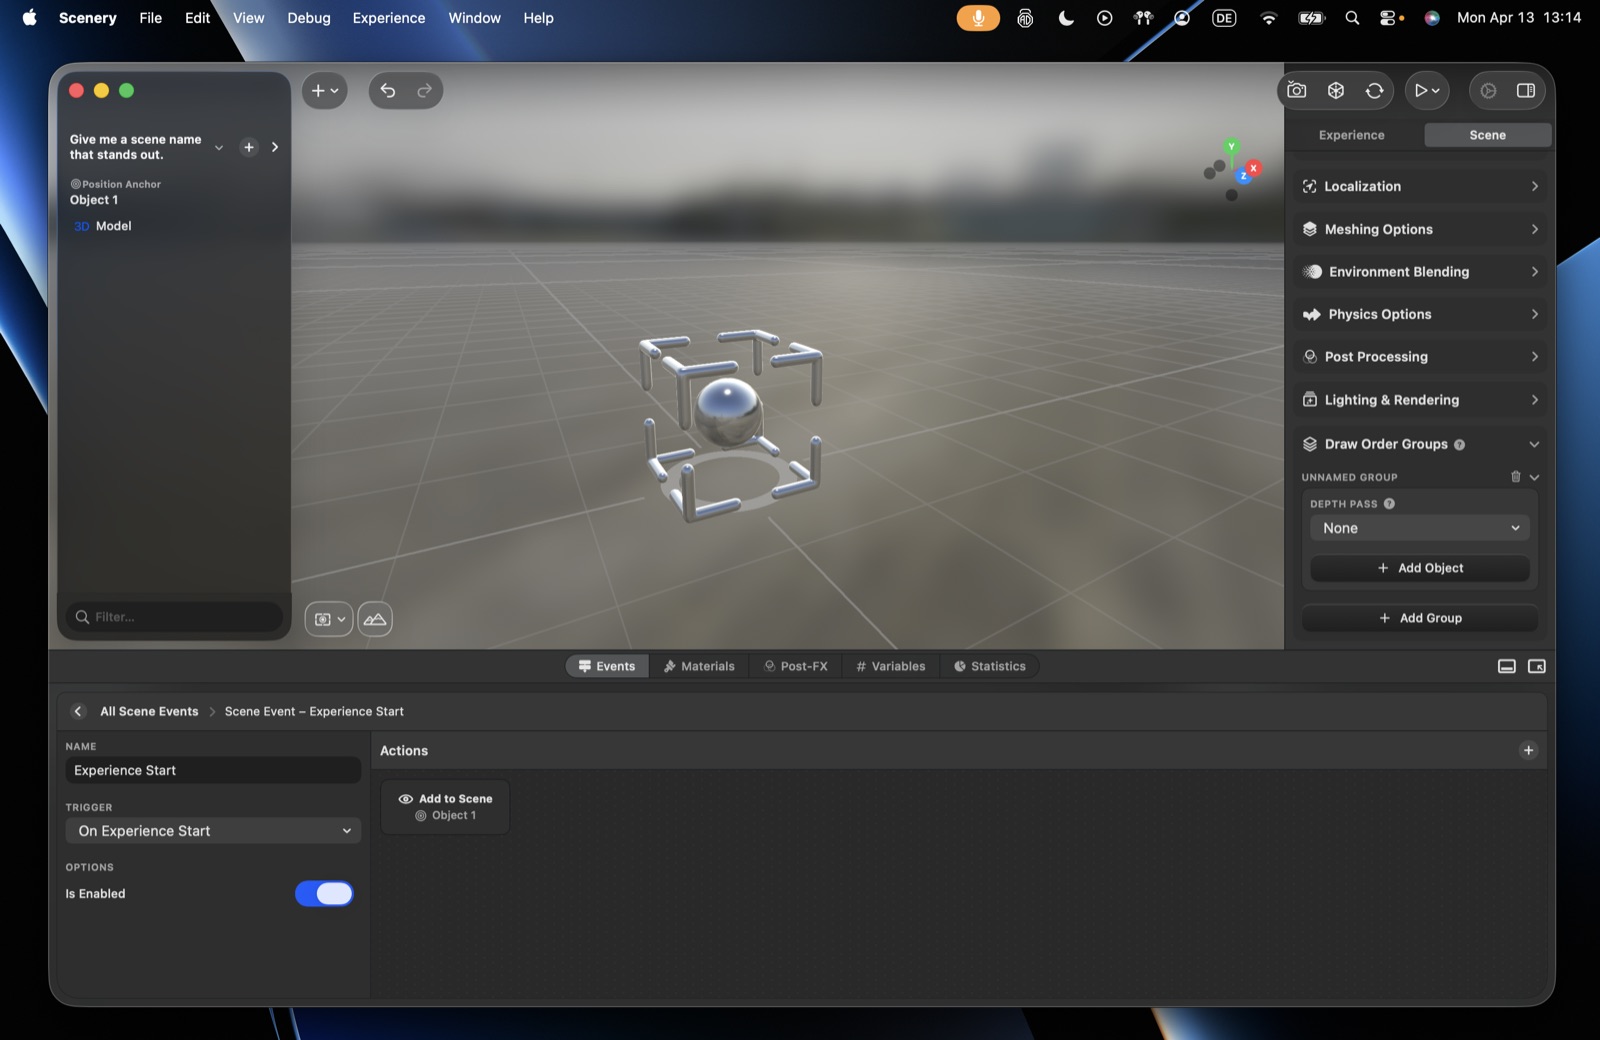 A Draw Order Group and its Depth Pass.